Monday, February 27, 2017

Sweetie Pie Sew Along - Week Seven - Blueberry Pie!!


Hey cute people!
Welcome to week seven in the 
Sweetie Pie 
Sew Sew Along


I cannot believe that we are
 almost finished with
 the quilt:)

I'm sew excited!!


I'm sure having a 
good time playing with 
Sew Cherry 2!


Today is our last block...
Blueberries:)

I love these little cuties!


Grab your 
and cut your fabrics
 and interfacing according to


Trace onto your interfacing...


Stitch on your traced line...


and trim:)


Cut your "X" in the back...


Turn...shape and press.


Iron a center crease onto your 
background fabric 
and measure 3" down.


Place a little dot 
there with your pencil.


Now trace the embroidery lines...
 that dot that you marked
 is where all of the branches meet up:)


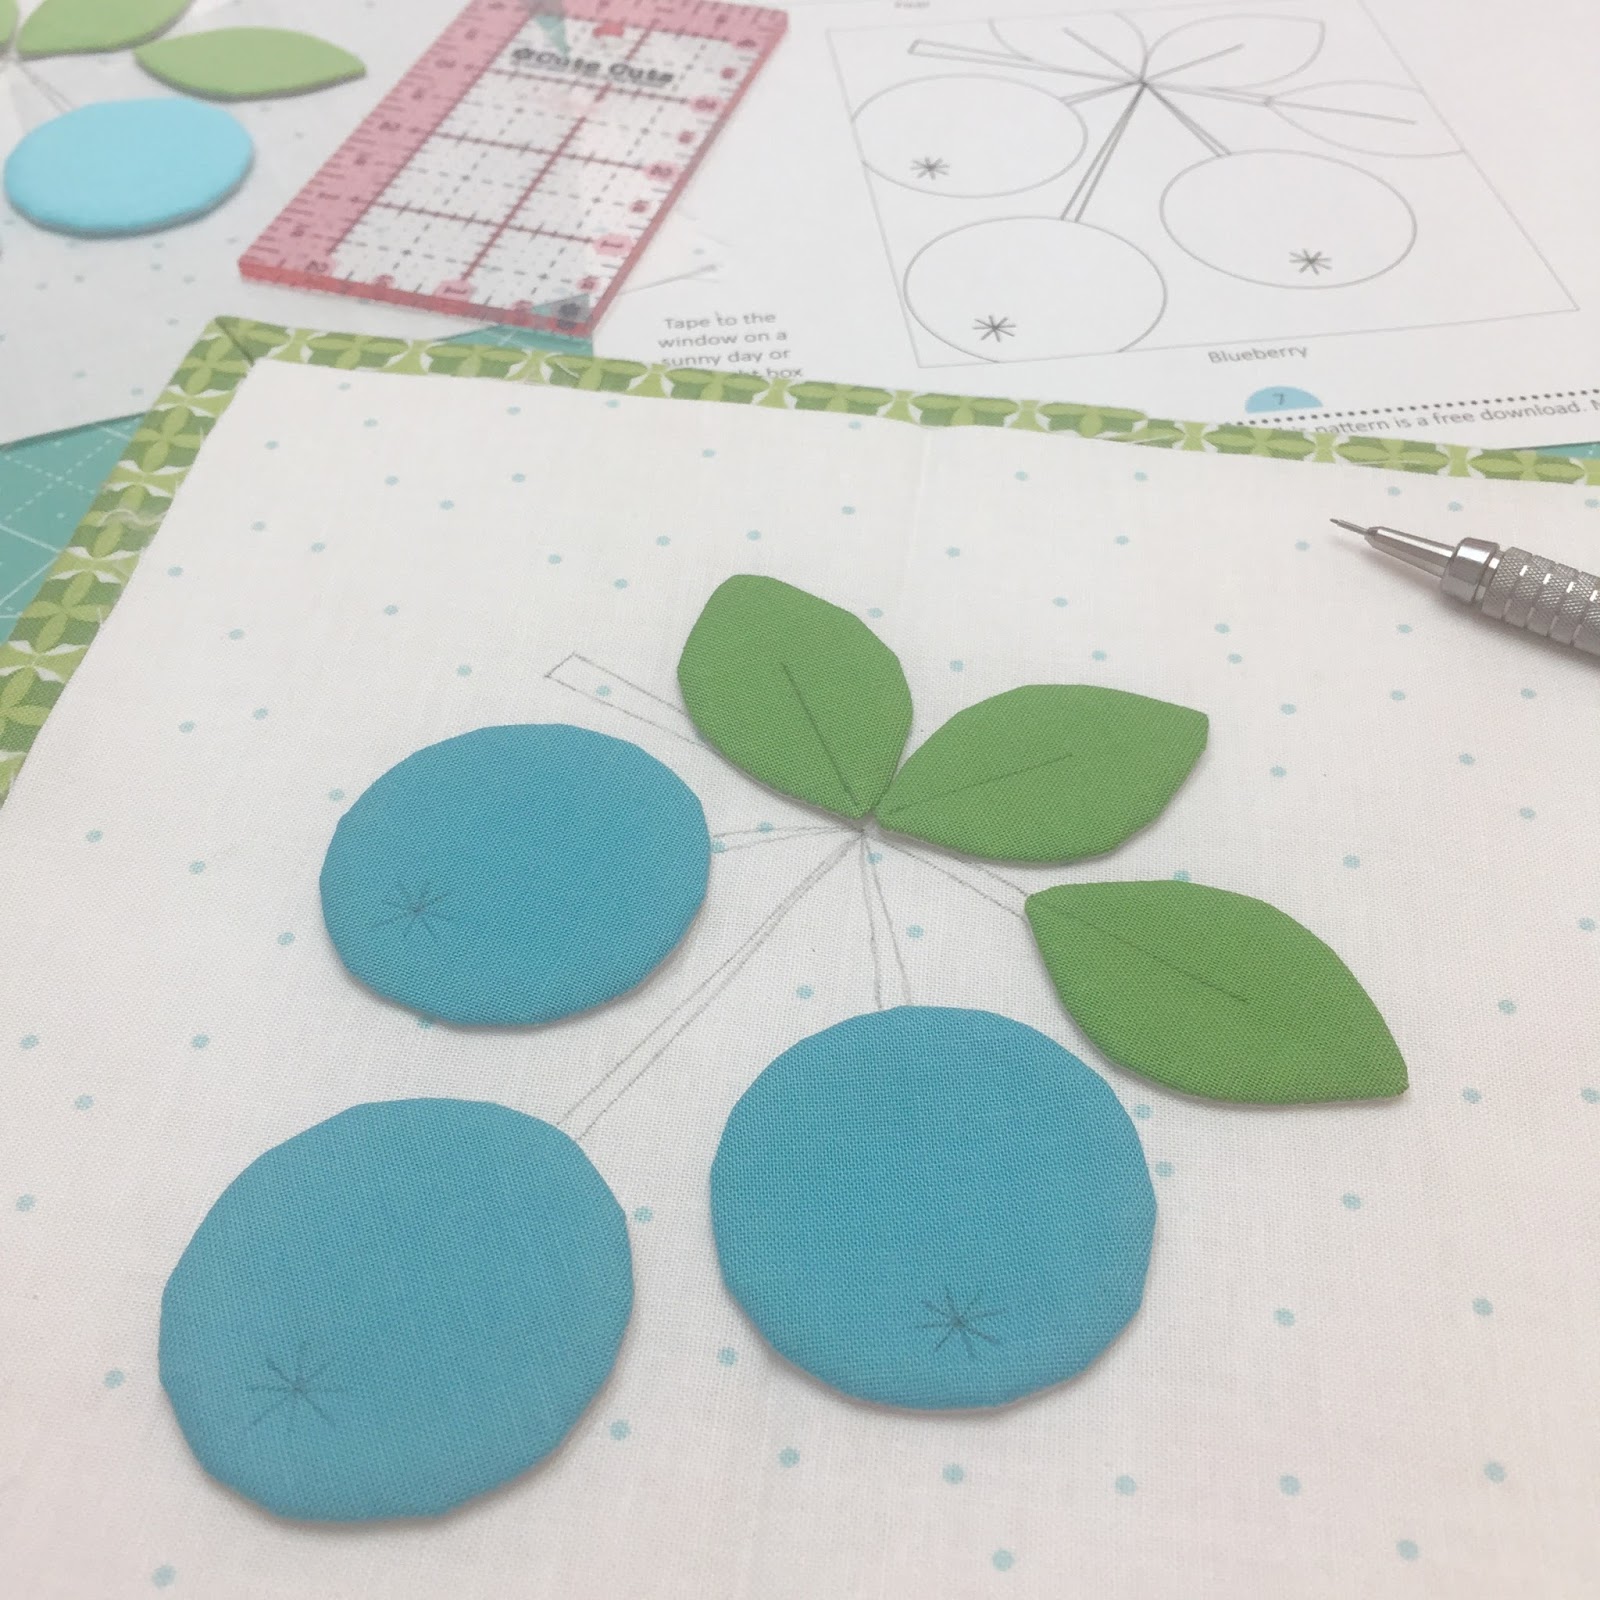
Trace your embroidery lines onto the blueberries and leaves...


Pin or glue baste.
Now it's time for the appliqué!


When appliqué is complete...
do the embroidery:)


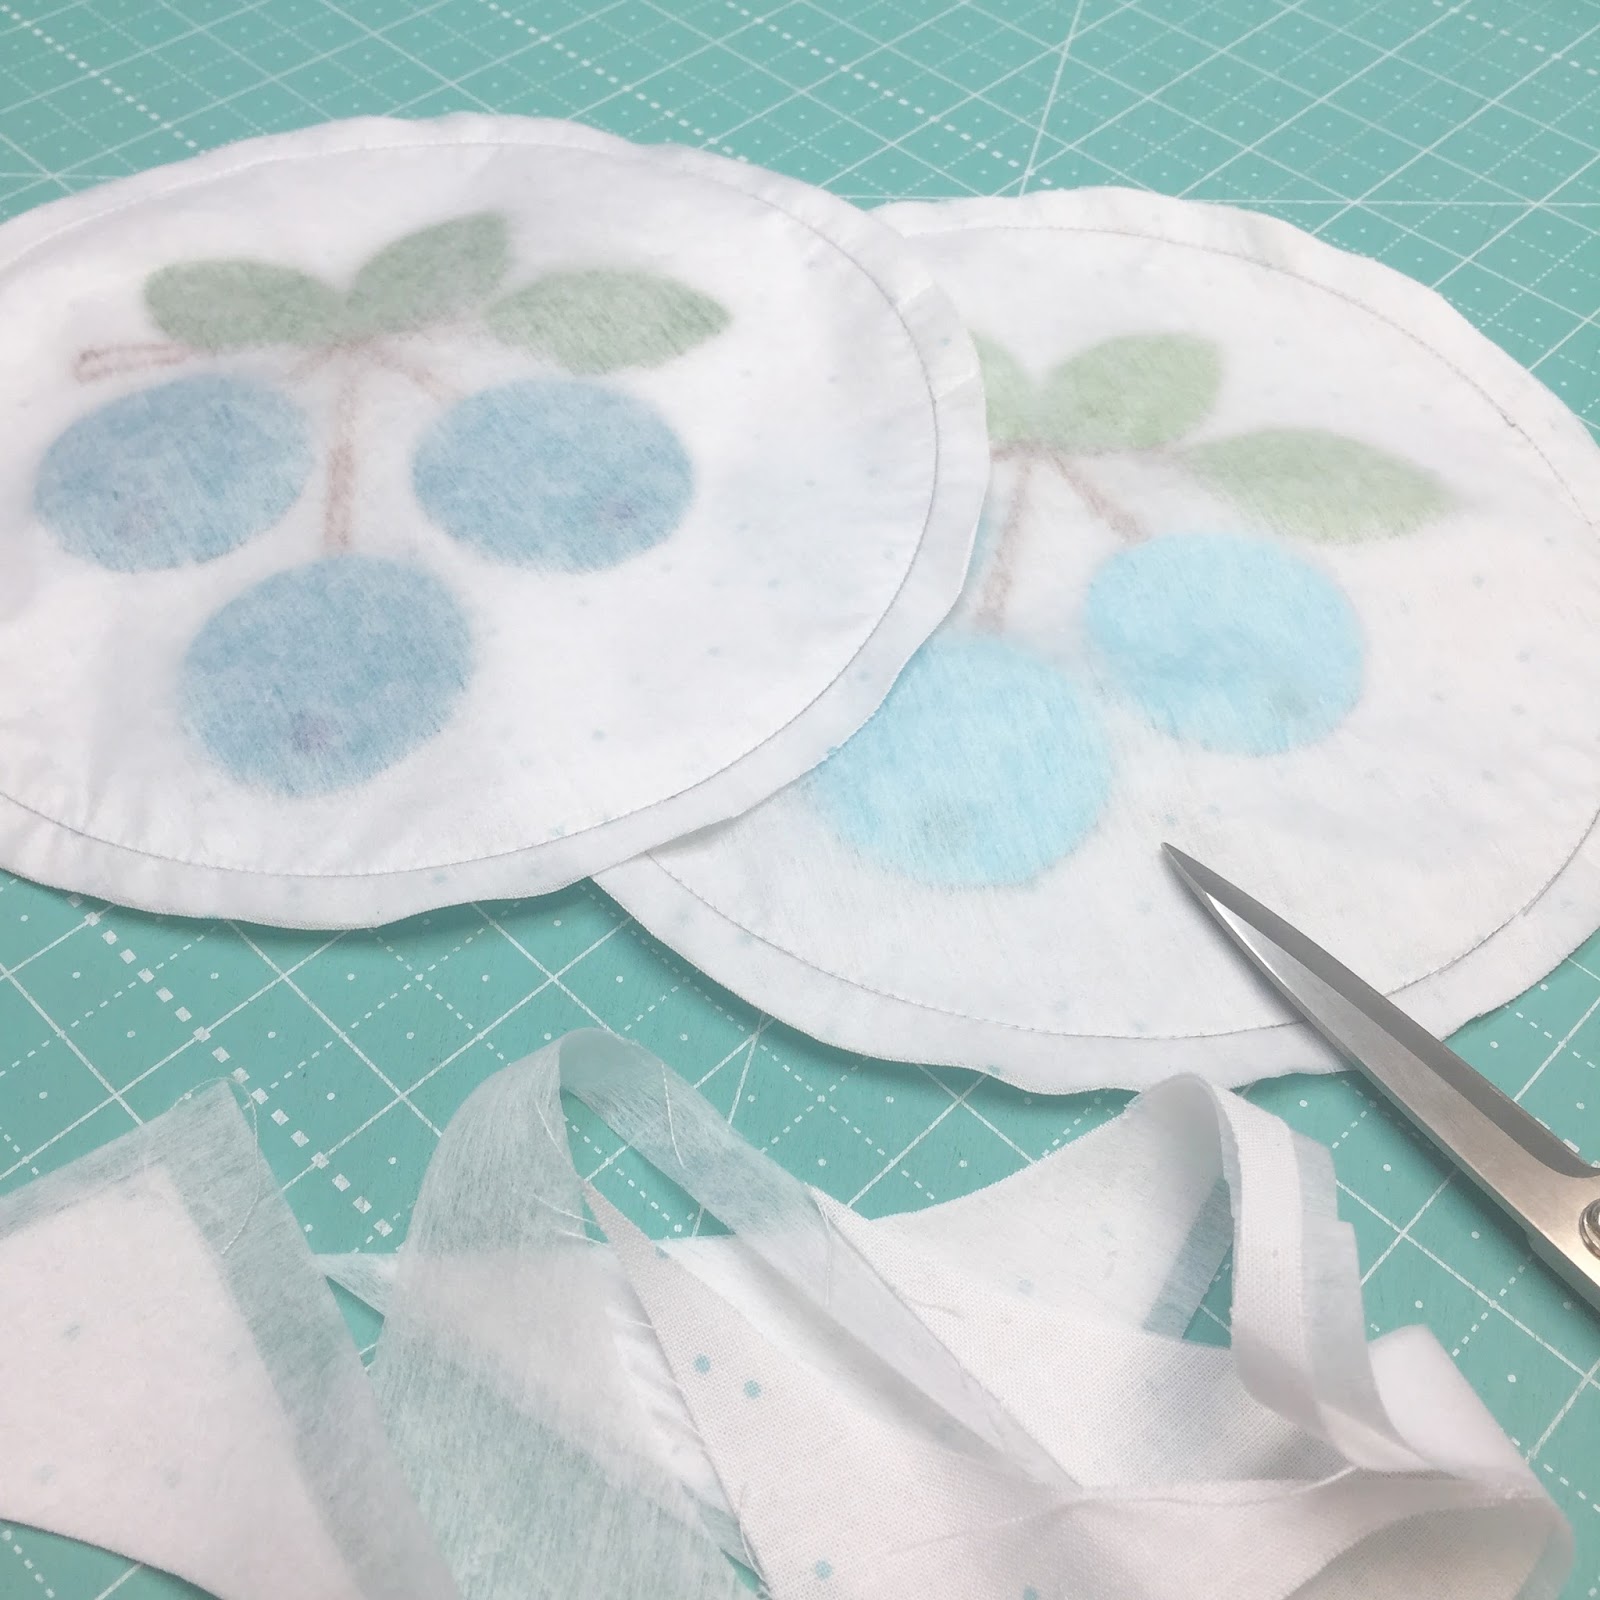
Now make them into circles!


Time to fill your blueberry pies:)


Appliqué them into place.


If you haven't trimmed up 
all of your blocks yet...
now is the time!

(I showed you how last week)


YaY!!! 

Now that all of our 
blocks are completed...
we will focus on the 
daisies next week:)

See you then!!
xx
Lori

P.S. Just a reminder that each week of this sew along will always remain here on my blog.
Just scroll down and look on the right sidebar until you find them!


Friday, February 24, 2017

Scrappy Project Planner Sew Along - Week Four - Happy Trails Quilt!!


Welcome to week four of the 
Sew Along


There are six patterns included
 inside of the planner and 
each week we are focusing on one of them:)

And today's focus is...


Just like all of the
 quilts in the planner...
this one is perfect for your
 scrappy stash... 
but Happy Trails is especially 
layer cake friendly:)


 Just in case you are wondering how
 I named this quilt: 
All of the small diagonal squares
 running
 both ways across the quilt
 look like happy trails to me:)


All of the scrappy colors
 make me HAPPY! 
This pillow on my 
front room settee says it all!


Here are some of the quilts
 stacked on an old library cart
 in my front yard:)

Happy Trails is on top!


Here are a few 
behind the scenes photos 
from setting up the quilts
 for their close ups:)


I love that Kassidy is 
always my trusty side kick:)

For those of you who have been 
following my blog 
from the very beginning...
you have literally been
 watching her grow up!


I used all different colors
 for the 
small diagonal squares 
in the quilt for the planner...


But I wanted to show you the option 
of choosing one fabric instead...
like red for this one.

It changes the look up 
a little bit and
 is perfect when using one
 fabric collection 
for the entire quilt.

This one is made using my 
Cozy Christmas Collection:)


Next week we 
will be focusing on my 
Checkerboard Quilt:)

Don't for get to 
visit Kimberly's blog
and visit this weeks
 guest bloggers too!

xx
Lori


Monday, February 20, 2017

Sweetie Pie Sew Along - Week Six - Apple Pie Block!!


Hello and welcome to week six of the


if you are just getting started and

to download the free pattern


Today we are baking 
Apple Pies!


Grab your fabric...
 interfacing and 
trace your 


Use the cutting chart included
 in the pattern to cut your pieces:)


Sew directly onto your traced lines.


When trimming the seam allowance..
make sure to make a few clips 
at the top of each apple's inner curve.


Cut the interfacing...


Turn... shape and press!


Place the apple
 1 1/2" up from the bottom 
of your background square.
Make sure its centered by 
pressing your square in half:)


Glue or pin baste the apples...
 trace the stems and 
the lines on the leaves.

Now you're ready for appliqué!


And the embroidery!


Use the C-15 to trace
 onto the interfacing squares...


and make your apples into circles:)


Appliqué them to the
center of your pie blocks:)


This week I trimmed up 
all of my pie blocks 
because we only have
 two more to sew:)

YaY!

This is the final step in 
making sure that 
your pies are centered:) 


Just a little bit 
about my new 
Cute Cuts 
Trim-It Rulers

There are 11 in the collection 
and I designed them all 
 with centered lines going both
horizontal and vertical
 as well as diagonal.

This makes it super duper easy 
to trim up any quilt block perfectly!

They also have built in non-slip 
on the back and are easy to use.


There are 1/4"seam allowance 
all the way around the edges
 so that you can see 
what your block will look like
after its sewn into the quilt 
and also to make sure that you 
don't cut anything off 
that you aren't supposed to.
Yikes!
(like points when you are 
trimming up a pieced quilt block)


Place the 16 1/2" 
Trim -It Ruler 
onto your block.

 Line up the dresden seams 
with the lines on the ruler ...


on all four sides...


like this.


Now you're ready to trim...
 so grab your rotary cutter:)


I'm right handed ...
so I always trim on the 
right and the top first.
If you are left handed ...
simply do the left side first.


After those first two sides are trimmed...
 place your block upside down like this.

Because you have already 
trimmed those two edges...
you can line them up with
 the edges of he ruler 
(they are now left side and bottom)


And go ahead and 
trim on the right 
and the top:)


YaY!
Now your pie block 
is exactly centered 
and is a perfect
 16 1/2" square:)


P.S. Did you happen to catch my tutorial
 that I did a few days ago on my
 Cherry Hearts Placemat?

if you want to make one!

Related Posts with Thumbnails